In this blog we are going to talk about Hashicorp Vault. Hashicorp Vault is an open-source secrets management platform that provides full lifecycle management of static and dynamic secrets in your environment. In this blog I’ll tell you about installing, config and managing secrets in Hashicorp Vault on Windows. The Hashicorp Vault is a way to store and manage the lifecycle of secrets within your organization. Vault is working through an API. Every command is going to go through that API and then interact with Vault. To get access to the Vault there are different types of authentication methods. You can use tokens, username/password, Active Directory credentials etc. Through groups and policies you are able to control the access of the secrets. All actions are logged in the Vault and can be exported.
The vault is sealed by using the Shamir encryption method. Instead of 1 master key you need multiple keys to unseal the Vault. Through this way you can give multiple persons 1 key. When the Vault must be unsealed these persons need each other to unseal the Vault.
There are of course other products. Think about Azure Key Vault and AWS Key Management Services but these are cloud products. If you want to manage your credentials locally Hashicorp Vault is a great choice.
Installing Vault on Windows.
Vault is a single executable binary that’s compiled from Go, so it’s not a particularly complicated setup.
- If you already have Chocolatey (Windows Package Manager) installed on Windows, you can simply run “choco install vault”. Chocolatey will download Vault, install it and put it in an executable path for you.
Install Chocolatey and Vault:
- You can download it yourself from the Hashicorp website ( https://releases.hashicorp.com/vault/ ), unzip and save the Vault in an executable path.
- You can use the Install-Vault cmdlet from the PSVault module.
In this blog we will use the PSVault module. This module contains multiple cmdlets. The Install-Vault cmdlet from this module will do the work for you. I will explain everything step by step.
Before we are able to start using Install-Vault, you will have to download the module PSVault. The PSvault module can be downloaded from my github page: https://github.com/D2CIT/Hashicorp-Vault
You can download it as a zip-file or you could clone it via GIT.
git clone https://github.com/D2CIT/Hashicorp-Vault.git
Unzip or copy the PSVault folder to “C:\Program Files\WindowsPowerShell\Modules”
Run the Import-Module cmdlet to import the module. See Below. 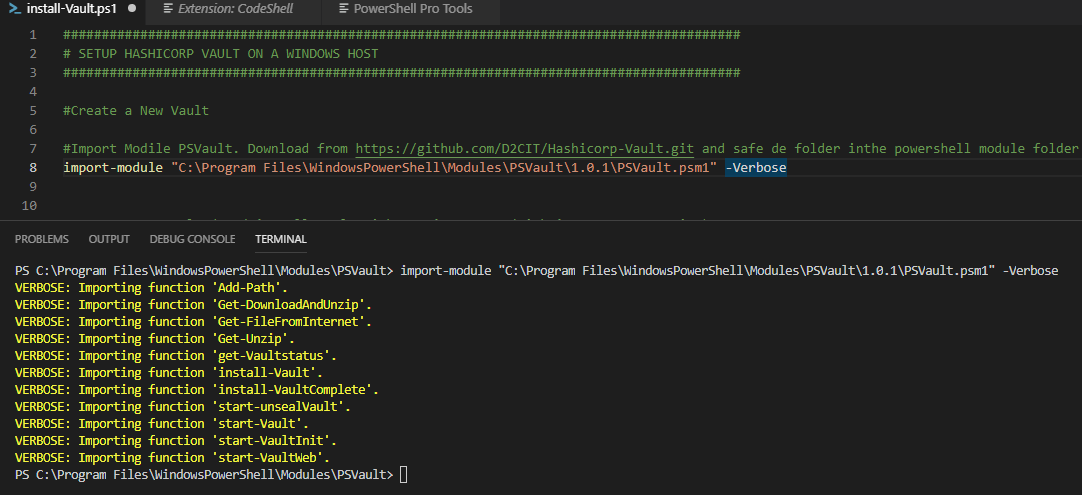
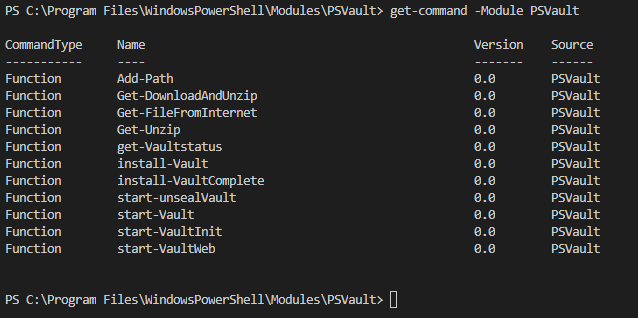
The module is downloaded, imported and ready for use. With the command “get-command” you can see which cmdlets are available in this module.
Install-vault will do the following actions
- Check internet Access
- download Vault from the Hashicorp website if internet connection is successful
- use the “-vaultzip” parameter with the fullpath to the download zip. You can use this option if you don’t have an internet connection.
- Create a directory structure for Vault
- Add the path of the vault.exe to the environment path
- Create the config.hcl with the default settings for Vault
- Create a scheduled task for running the Vault. Vault will start through this task when the system starts. The task will run under the system account
- Start the scheduled task to start Vault.
Let’s run the command Install-Vault as shown below. We will install Vault version 1.1.0 (March 2019) in the “c:\program files” folder.
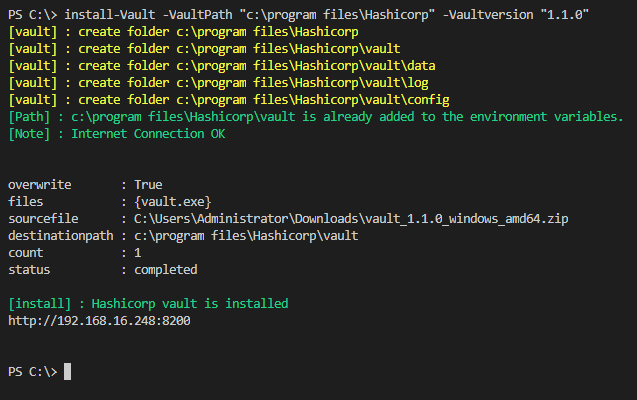
If we check the folder “c:\program files”, you will see that the folder Hashicorp is created with the subfolder Vault.
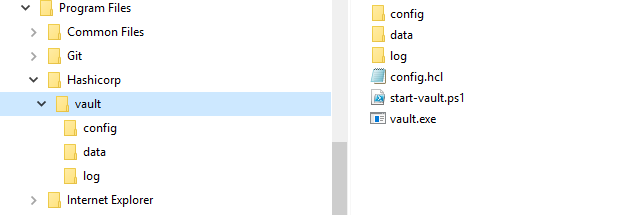
The subfolder Vault contains the file config.hcl with the vault settings, the start-vault.ps1 for starting Vault manually and the Vault binary Vault.exe .
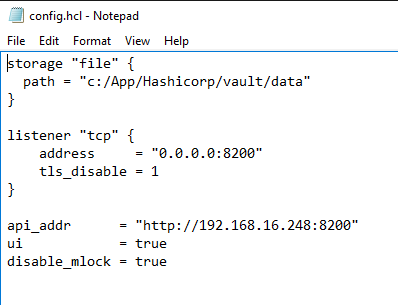
The config.hcl contains config setting for Vault .
- The path to the storage folder,
- The listener port ,
- The API-address,
- UI is on true, for using the user interface via the browser
- Disable_mlock for protecting against dumping the memory
The subfolders of .\Vault are :
- config folder : created for config files. Like policy etc.
- data folder : the Vault data files
- log folder : created for the audit logs
The data folder contains the data of Vault. All files are encrypted. Do not change anything in this folder .
Start Vault
Let’s start Vault for the first time. We will run the command start-Vault. This cmdlet will create (if not exists) a scheduled task with the following settings :
- Name : Hashicorp Vault
- Trigger : at startup
- User : system
- Arguments : server -config=”c:\program files\Hashicorp\vault\config.hcl”
- Execute : c:\program files\Hashicorp\vault\vault.exe
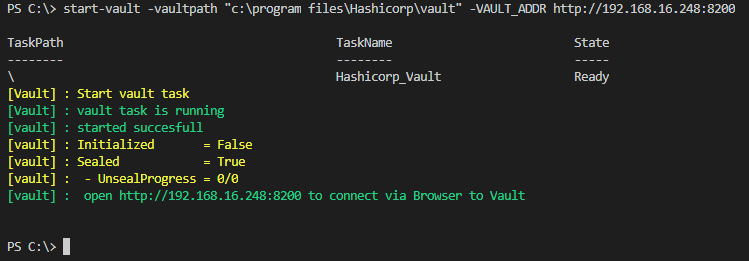
When the task is created, the script will check and start the task. When the task is running Vault is started.
At the end, the script will check the status of the Vault. In the output below we see that the value sealed is true and the value initialized is false. This means that the Vault is not initialized and sealed.
Vault Initialize
Even though Vault is started, we cannot use it yet. It’s a new vault and before we can use it we have to initialize it first. We can initialize the Vault by running the cmdlet Start-VaultInit.
Start-VaultInit will run the Vault command.
vault operator init -address=http://192.168.16.248:8200 .
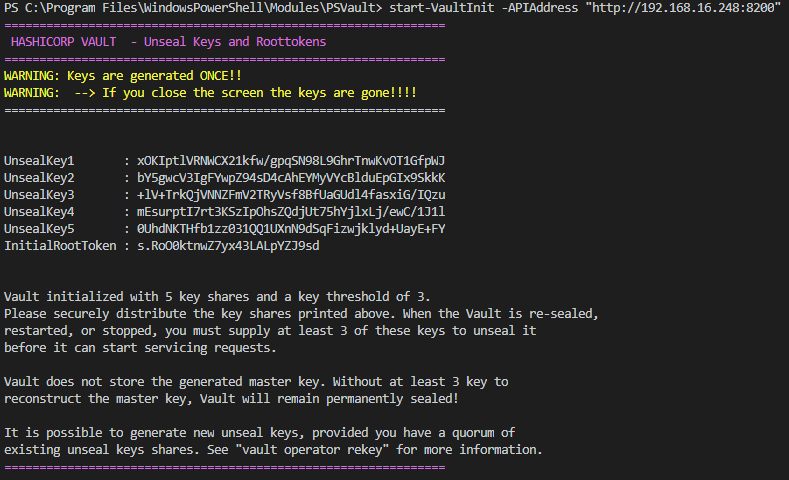
The unseal and root tokens are showed once. When you close the screen there is no way to retrieve them again.
Default the cmdlet will create two files in the .\Vault\Config folder. The unsealkeys.xml and the AESKey.txt created. The Unsealkey.txt stores the unsealkeys but the keys are encrypted with the AESKey stored in the AESKey.txt.
Note : If you use the switch parameter “-secure $false” the keys wil not saved encrypted in the xml file will we created.
—————————————————————————————————————————————
Warning : The keys are safed encrypted in the xml file. The AESkey is default saved in the same folder. This key is needed to decrypt the UnsealKeys. So save the AESkeys in a secure place and not together with the encrypted keys in the UnsealKeys.xml.
—————————————————————————————————————————————

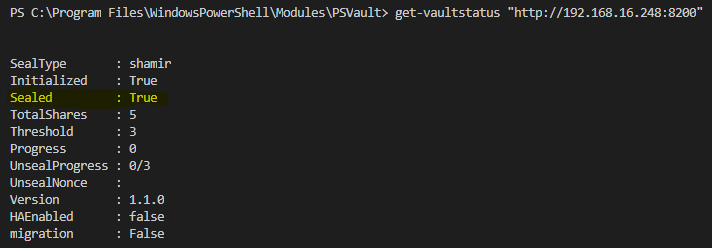
When we run the cmdlet Get-VaultStatus (See below) we can check the current status of the vault.
The Vault is initialized know but is still sealed.
Vault Unseal
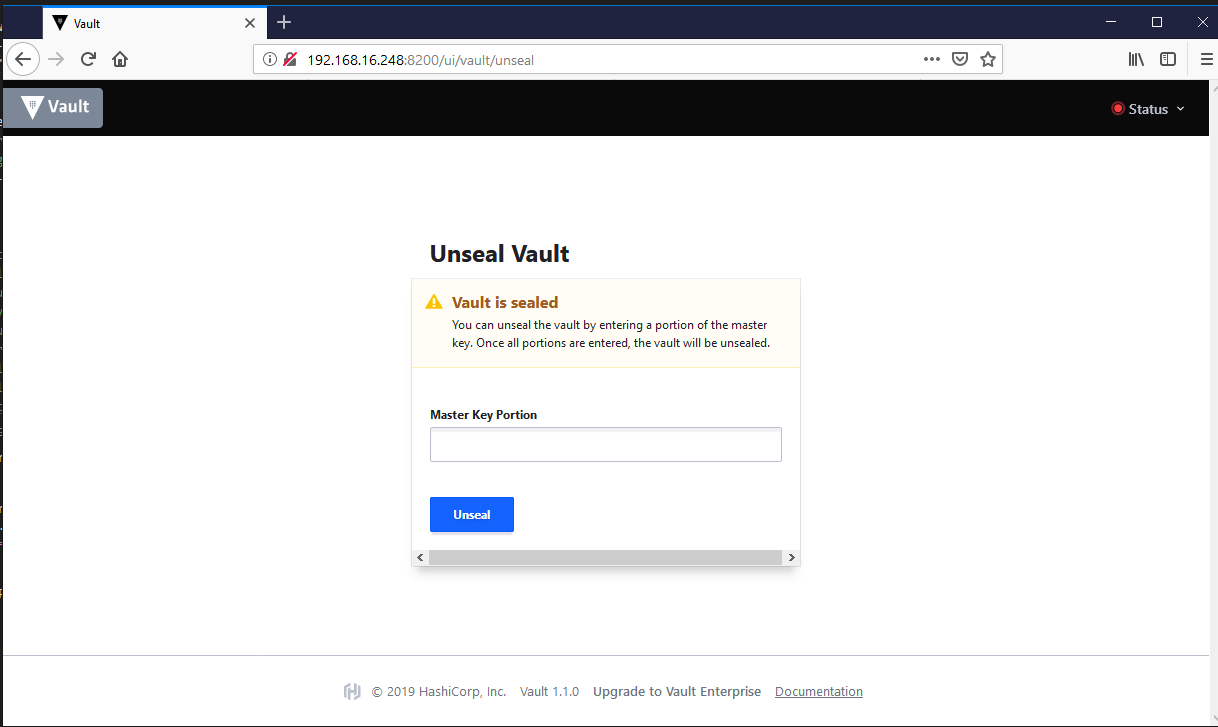
We will have to unseal the Vault before we can use it. We can unseal the Vault via the commandline or through the Vault website (http://192.168.16.248:8200)
When we connect to the Vault UI, we will see that the Vault is sealed as well . When a Vault server is started, it starts in a sealed state. So if you reboot the server, stop the scheduled task or kill the vault.exe in the taskmanager , you will have to unseal it when you start Vault again. There are default 5 unseal keys and you need default 3 keys to unseal.
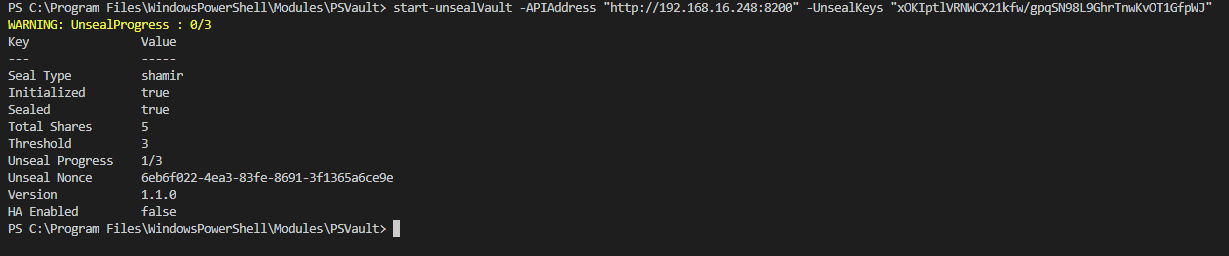
We will unseal the Vault via the commandline by using the cmdlet start-UnsealVault. This cmdlet will use the vault command vault operator unseal -address=”http://192.168.16.248:8200” “xOKIptlVRNWCX21kfw/gpqSN98L9GhrTnwKvOT1GfpWJ” and will validate the process.

You will have to run this command with 3 different unseal keys. You will see that unseal progress is changed to 1/3 after running the unseal command for the first time.
To unseal we will have to run the same command with 2 other keys.
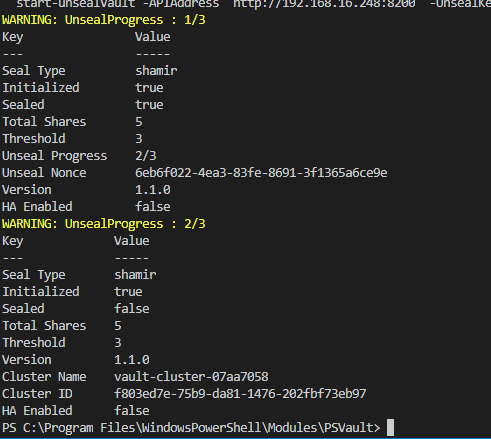
After running the command with the different keys you will notice that the sealed value has changed to false. The vault is now accessible.
Note : We can also use the UnsealKeys.xml to unseal. See example below

Vault Login
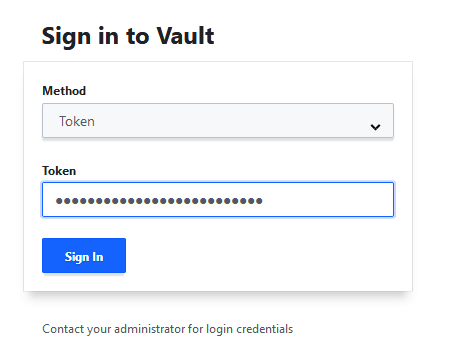
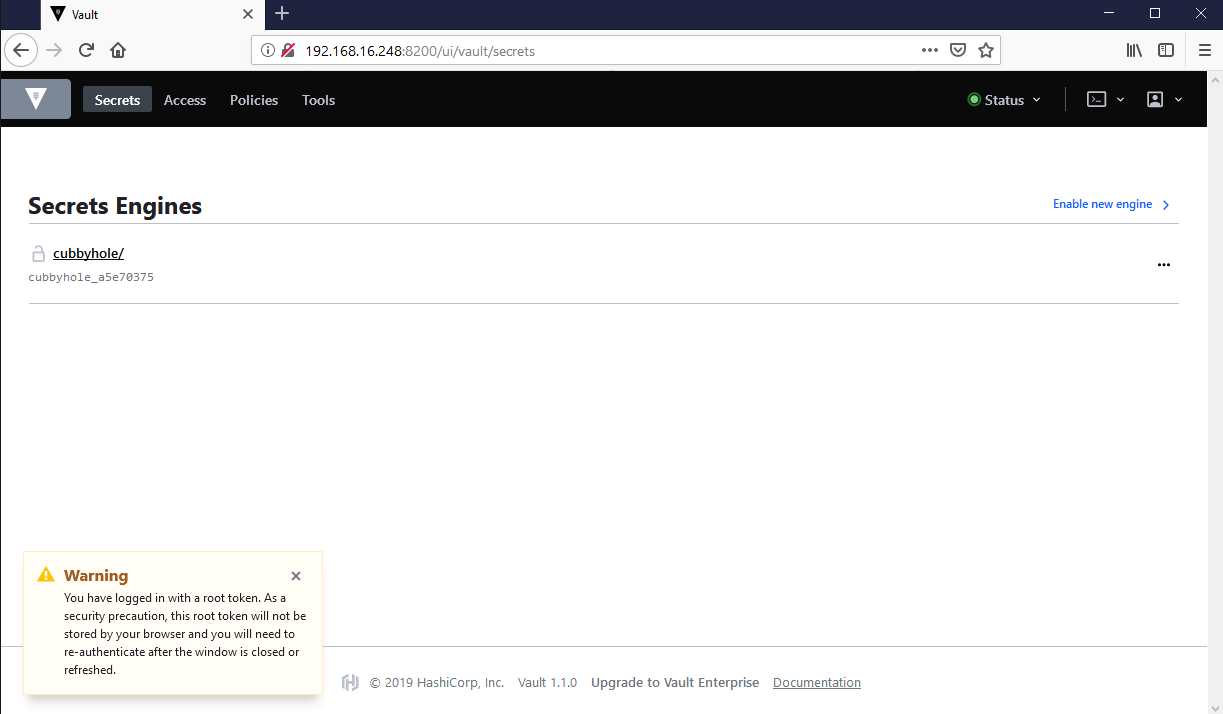
Let’s first check the Vault UI (http://192.168.16.248:8200). We see that the UI is having a login screen.

Because this is the first time that we are going to login to the Vault, we have to login with the root token that we received during the vault init process.
Login via the PowerShell commandline
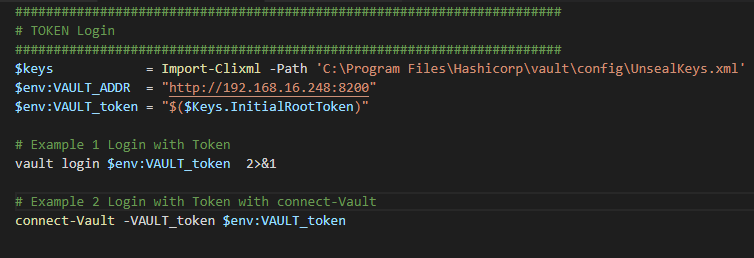
The first example shows the vault command. In PowerShell and the Powershell_ISE you will receive some errors. The connect-Vault will convert the output to a readable and usable output.
Setup Auth login via username and password
I mentioned before that we can also use the username password authentication method.
- Step 1. Login via commandline with the root token
Run command connect-Vault -token $env:Vault_token
- Step 2. Enable userpass
Run command vault auth enable userpass
- Step 3. Create username
Run command vault write auth/userpass/users/vaultuser password=”MySecretPassword12!”
- Step 4. Login with userpass
Run command vault write auth/userpass/users/vaultuser password=”MySecretPassword12!”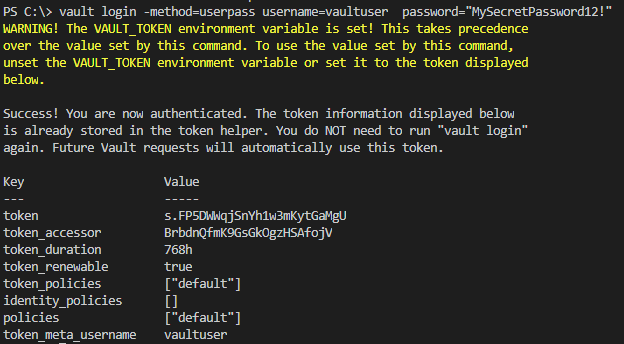
Setup Auth login via LDAP (Active Directory)
- Step 1. Login via commandline with the root token
Run command connect-Vault -token $env:Vault_token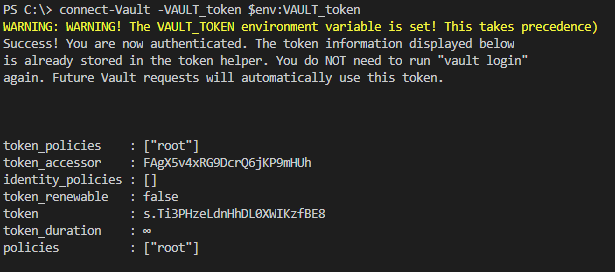
- Step 2. Enable LDAP
Run command vault auth enable ldap
- Step 3. Config LDAP in Vault
Run command below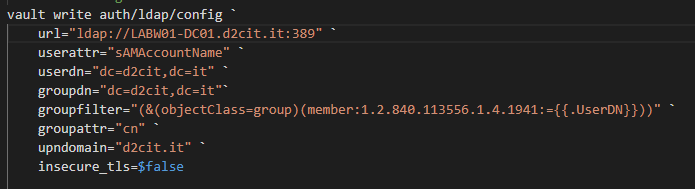

- Step 4. Login with userpass
Run command vault write auth/userpass/users/vaultuser password=”MySecretPassword12!”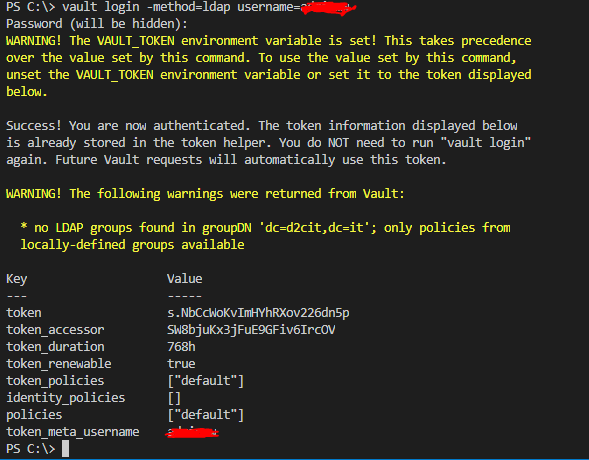
Enable Auditing
With the command below we can enable auditing.
vault audit enable file file_path=”c:\program files\Hashicorp\vault/log/vault_audit.log”
The Vault is now configured and ready for use.