How to connect Ansible to a Windows host via WinRM, with Basic, NTLM or Kerberos authentication
Are you struggeling to get your Ansible WinRM connection working with your windows host? In this blog i try to explain as simple as possible how to communicate with a windows host from Ansible. This via Basic, NTLM and Kerberos authentication over WinRM.
Ansible is a very powerful and simple open source automation platform. Ansible can help you with configuration management, application deployment and task automation. It can also do IT orchestration, where you have to run tasks in sequence and create a chain of events which must happen on several different servers or device.
Ansible is primarily built to communicating with a Linux host via SSH. To communicate with windows we will have to use WinRM. Windows Remote Management (WinRM) is the Microsoft implementation of WS-Management Protocol, a standard Simple Object Access Protocol (SOAP)-based, firewall-friendly protocol that allows hardware and operating systems, from different vendors, to interoperate.
This blog will include the following sections:
- Setup test environment
- Ansible with WinRM Basic Authentication
- Ansible with WinRM NTLM Authentication
- Ansible with WinRM Kerberos Authentication
Before we can start you should have a test environment with an ansible server. In my test environment I’m using Hashicorp vagrant and virtualbox . For the ansible server we will use Centos 7 and the windows host windows 2016.
Setup Test Environment
I’ll use the package installer Chocolatey. With chocolatey you are able to automatically install the applications Vagrant and Virtualbox.
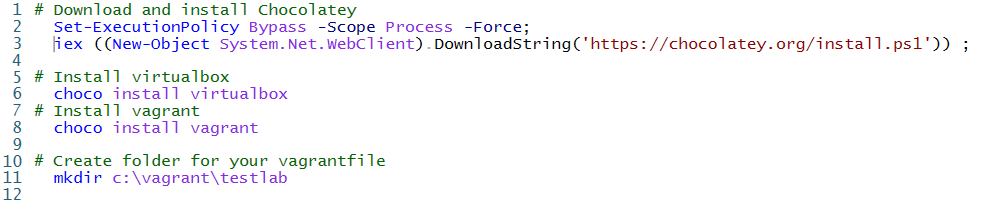
Step 1 : Install the chocolaty package manager .
Run the commands below from PowerShell. With these commands we will install Chocolaty, Virtualbox and Vagrant.
Step 2: create the vagrantfile.
The vagrantfile is a ruby file used to configure vagrant on a per-project basis. The main function of the Vagrantfile is to described the virtual machines required for a project as well as how to configure and provision these machines. The vagrantfile we created contains the infrastructure as Code configuration for the test environment.
- Open Powershell as Administrator
- Create the folder c:vagranttestlab. (powershell: mkdir c:vagranttestlab) .
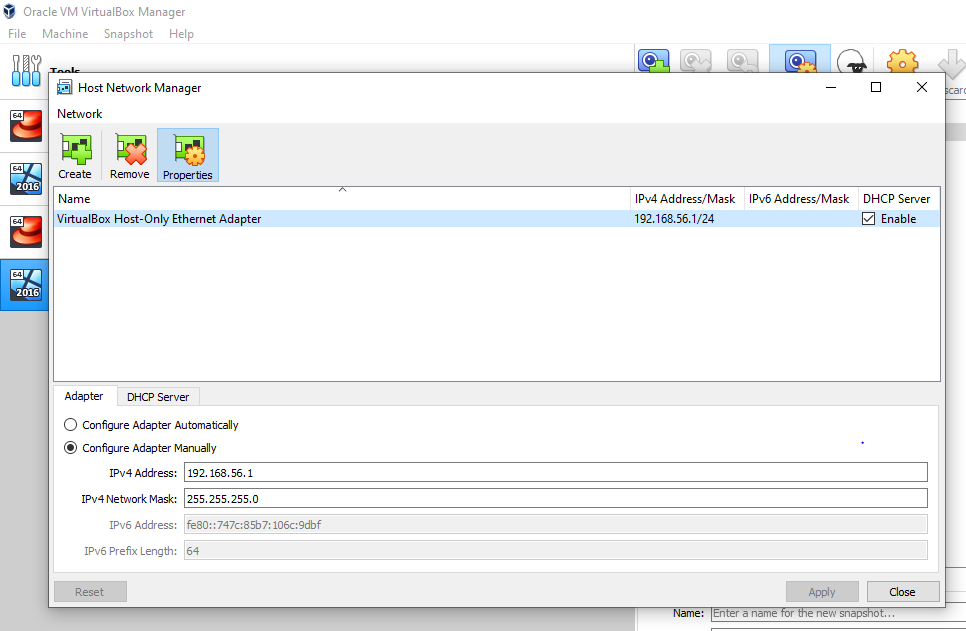
- Setup your network in Virtualbox
Open virtualbox and click on file -> Host Network manager.
Create the network as below.
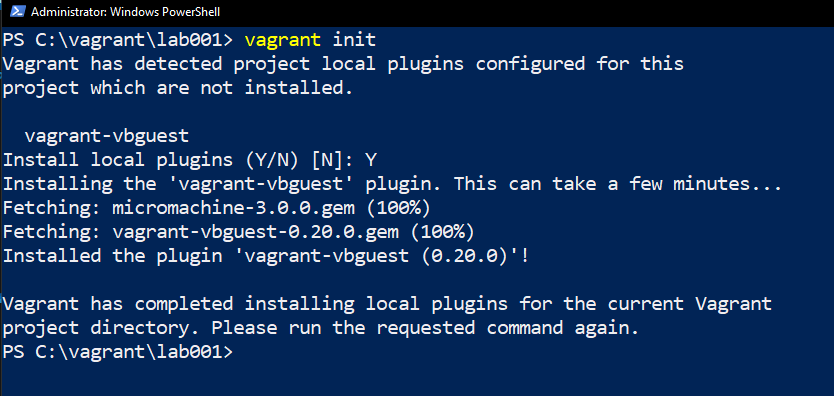
- Run the command cd c:vagranttestlab to change the currentlocation of powershell to the folder where we want to create the vagrant file in.
- Run the command vagrant init and the file vagrantfile will be created.
- Open the vagrant file with a text editor.Remove everything from the vagrant file and replace with the code below.
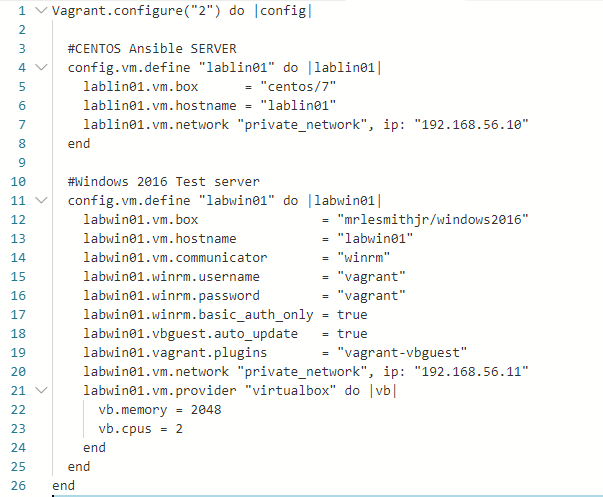
- Safe the file (without extention)
Step 3 : Create the VM’s
Note : To install the test servers you will need an internet connection for downloading the image from Vagrant.
- Run the command below to start the installation.

- Configure the lablin01 server as Ansible control server.
To install your Ansible control server connect to the lablin01 server over SSH. Run the vagrant command below.
- Note :if you would like to use ssh via the commandline you will need the public key. You can fin the public key in “..vagrantmachineslablin01virtualboxprivate_key.ppk”
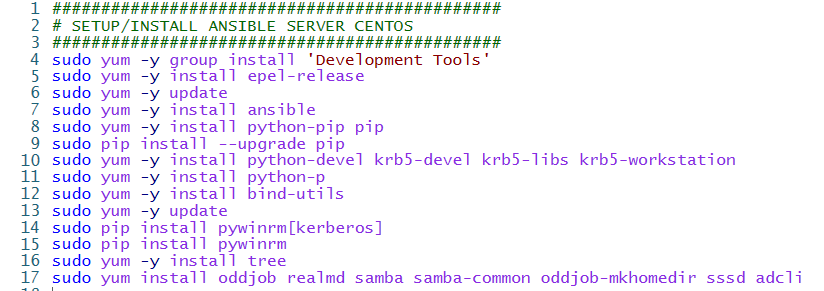
Step 4: Install Ansible.
Login to to the labln01 to configure this server as Ansible server. Run the commands below
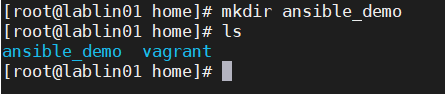
Step 5: Create the folder /home/ansible_demo
Run the commands to create a folder for the ansible files.

Ansible with WinRM Basic Authentication
The simplest way is to use WinRM Basic authentication. It is not secure but for test purposes a good way to test your first communication or to bootstrap your machine.
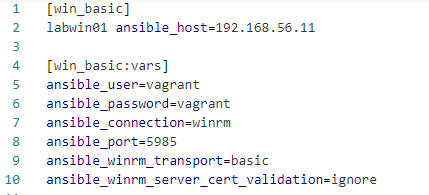
First we have to create the inventory file inventory_basic.ini. In this file we defined the remote host and the variables for the connection settings
Note : the variables can also be places in the folder group_vars.
The file name for the variables should have the same name as the groupname in your inventoryfile. So in this example create the file group_vars/win_basic.yml and save the settings below to this file
- Run the command below to create the inventory_basic.ini

- copy the code below to this file.
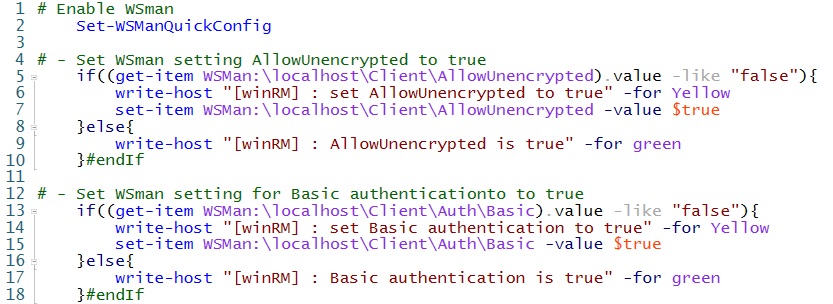
Before we can test the WinRM connection with Basic authentication we have to enable 2 settings on the remote windows host. We have to enable AllowUnencrypted and Basic authentication.
I’m using Powershell to configure these settings in WSMan.
Run the script below on the remote windows host to enable the WSMan settings for AllowUnencrypted and Basic authentication
We are ready to do the first test. In this test we will ping the remote server via the Ansible module win_ping.
Note : Run Powershell in elevated modes by running it as administrator.
Run from the ansible server the command below to test if the server is reachable via the ansible module win_ping. With win_ping you will test the connection and the credentials. 
We will see that we have successfully completed the test.

Ansible with WinRM NTLM Authentication
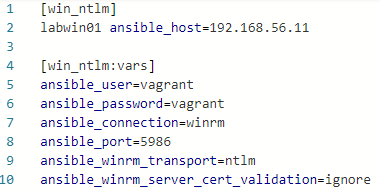
NTLM is a bit more secure than Basic ofcourse. We will use an ssl certificate to encrypt the traffic. The first thing we have to do is create an inventory file inventory_ntlm.ini in. In this file we defined the remote host and the variables for the NTLM connection. The settings are almost the same as for basic authentication. The only difference is that we defined the WinRM port to be 5986 (https) and the authentication method as NTLM.
The remote windows host needs some more configuration. We have to configure settings like Enable WinRM , a listener for port 5986 , firewall ports, create selfsigned certificate etc. On the ansible site you will find a script that will do the work for you. See : https://docs.ansible.com/ansible/latest/user_guide/windows_setup.html
- download the script. You can use the commands below:

- Run the downloaded script on the remote windows host
- Run the command below to create the inventory_ntlm.ini

- copy the code below to this file.
- run ansible command to ping remote windows host via NTLM auth.

We now see that we have successfully completed the ping via NTLM.

Ansible with WinRM Kerberos Authentication
When the remote host is part of a domain, we can use Kerberos. Run on the remote server teh same script as described at the NTLM authentication.(See : https://docs.ansible.com/ansible/latest/user_guide/windows_setup.html)
Before we can use Kerberos we have to configure the ansible control server.
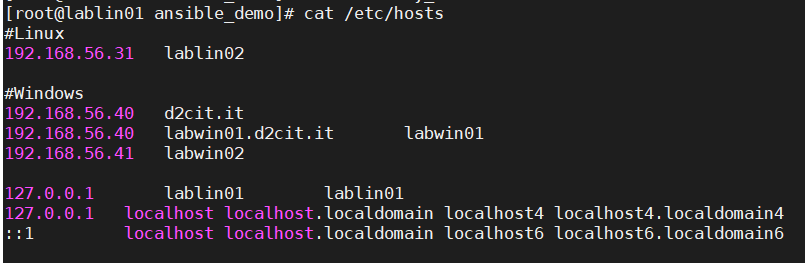
Configure : /etc/hosts
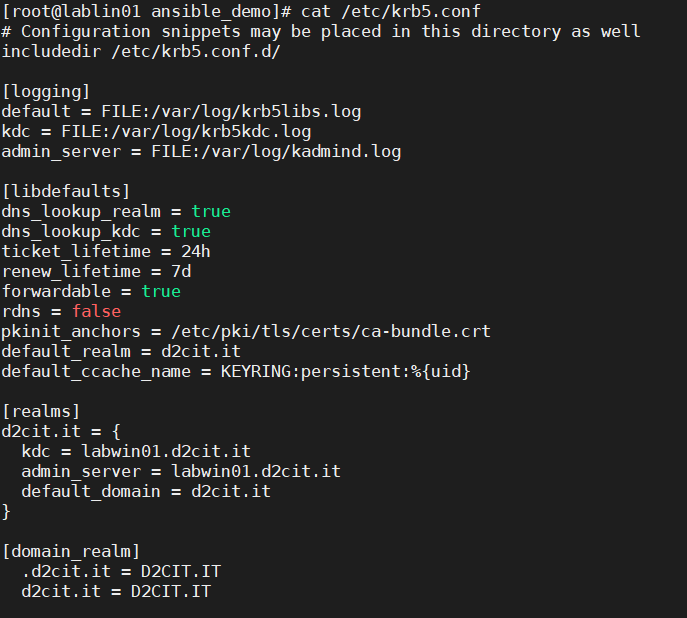
Configure : /etc/krb5.conf
Configure : /etc/resolv.conf

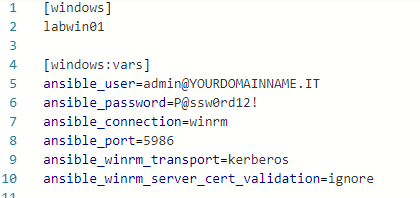
- Run the command below to create the inventory_kerberos.ini

- copy the code below to this file.
- run the ansible command below to ping remote windows host via Kerberos.

We now see that we have successfully completed the ping via Kerberos.
